What to Expect on Mini Split Installation Day in Grapevine and the DFW Area
What to expect on mini split installation day in Grapevine and the DFW area comes down to a straightforward, mostly single-day process — here’s a quick overview:
- Morning arrival – Technicians assess mounting locations and confirm the installation plan
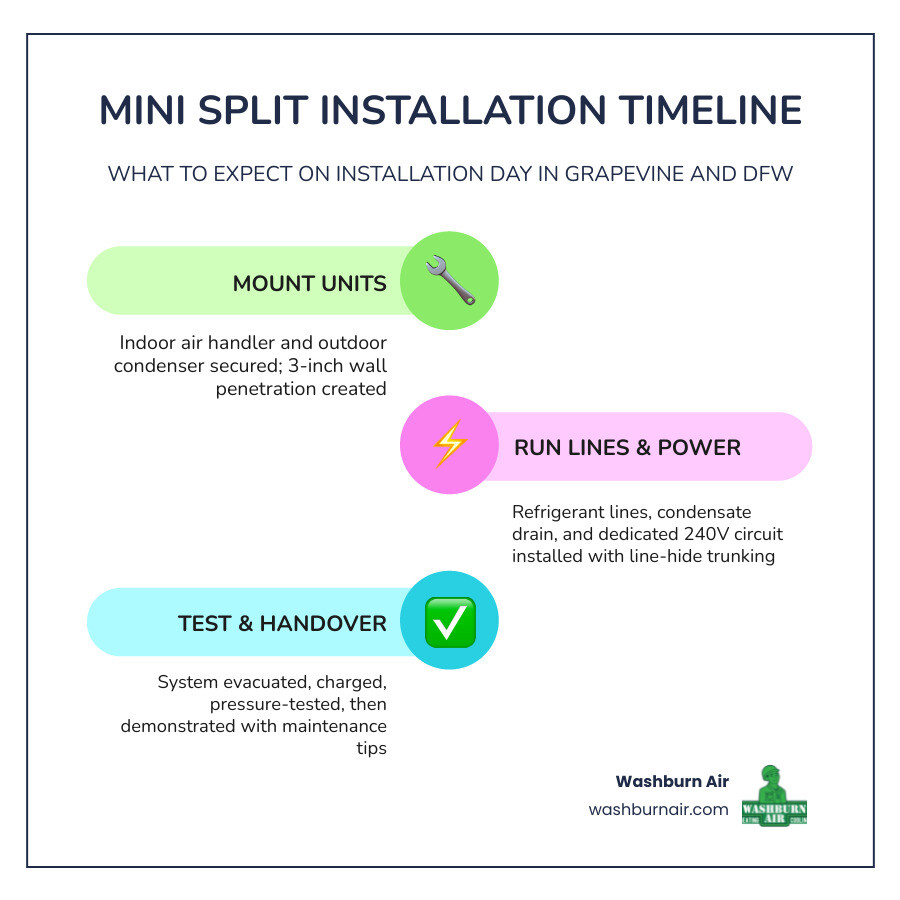
- Unit mounting – Indoor air handler and outdoor condenser are secured in place
- Line set installation – Refrigerant lines, electrical wiring, and condensate drain are run through a small wall opening (typically about 3 inches)
- Electrical connection – A dedicated 240V circuit and disconnect box are installed at the condenser
- System evacuation and charging – The lines are vacuumed, pressure-tested, and charged with refrigerant
- Final testing and walkthrough – The system is powered on, airflow and temperatures are verified, and you receive a full rundown on operation and maintenance
Most single-zone installations are completed in 4 to 6 hours. Multi-zone systems covering several rooms typically take 1 to 2 days depending on complexity.
If you’ve ever had a central AC unit give out on a 103°F Texas afternoon, you already know how fast comfort becomes a priority. A mini split can restore that comfort faster than most homeowners expect — often the same day. Whether you’re cooling a home addition, a bonus room above the garage, or your whole house, knowing what lies ahead on installation day makes the process far less stressful.
Pre-Installation Planning and Home Preparation
Long before our service trucks roll up to your driveway, a successful installation relies on a thorough site assessment. When we first visit your home for a consultation, we do not just guess at what system size you need. DFW summers are relentless, and under-sizing a system means it will run constantly, driving up your electric bills without ever truly cooling the space.
During the site assessment, we perform room-by-room load calculations. We look at the square footage, the height of your ceilings, the quality of your home’s insulation, and how many windows face the blazing west Texas sun. For instance, a standard two-car garage in Southlake or Arlington might only be 400 to 600 square feet, but because garage doors are rarely well-insulated, it usually requires a robust 12,000 to 18,000 BTU unit to keep things comfortable.
Once we calculate the proper capacity, we plan the physical placement of the units. The indoor air handler needs to be mounted on an exterior wall whenever possible to simplify drainage, high enough to distribute air evenly but away from direct sources of heat or steam. The outdoor condenser needs a stable, level surface—either a poured concrete pad or a heavy-duty composite pad—with plenty of clearance around it for proper airflow.
By finalizing these details during the planning phase, we ensure that our Mini Split AC Installation runs like clockwork when the actual installation day arrives.
Preparing Your Home: What to Expect on Mini Split Installation Day in Grapevine and the DFW Area
To make installation day as smooth and fast as possible, there are a few simple steps you can take to prepare your home before our team arrives.
First, clear the path. Our technicians will need to carry heavy equipment, tools, and ladders through your home. If we are installing an indoor air handler in your master bedroom, home office, or a bonus room, please move any fragile items, electronics, or small furniture out of the way. We recommend clearing a workspace of at least 5 to 6 feet directly beneath where the indoor unit will be mounted.
Second, think about the outdoor workspace. If you live in Grapevine or Highland Park, your HOA might have specific rules about where outdoor equipment can be placed. Make sure the path to the designated outdoor site is clear of lawn ornaments, toys, and pet waste. If we are mounting the condenser on the side of your home, trimming back any low-hanging branches or overgrown bushes will give our team the room they need to work safely.
Finally, we will need unrestricted access to your main electrical panel. Mini split systems require a dedicated 208/240V circuit. Our team will need to run wiring from your breaker box to the outdoor disconnect switch, so keeping the area around your electrical panel clear is essential.
What to Expect on Mini Split Installation Day in Grapevine and the DFW Area
When our team arrives at your home, we start with a brief huddle to walk through the project plan, confirm the mounting locations we discussed during your assessment, and answer any last-minute questions you might have.
The overall timeline depends heavily on whether you are installing a single-zone or a multi-zone system. A single-zone system—perfect for a detached home office in Westlake or a garage workshop in Irving—typically takes our crew between 4 and 6 hours. However, if you are opting for a multi-zone system to handle several bedrooms or a multi-story home, the project can take anywhere from 1 to 2 days.
Regardless of the scope, our experienced technicians approach every step of our HVAC Services with precision, care, and respect for your property.
Step 1: Mounting the Indoor and Outdoor Units
The physical installation begins with mounting the hardware. For the indoor unit, we secure a heavy-duty metal mounting bracket directly to your wall studs. It is absolutely critical that this bracket is perfectly level; even a slight tilt can prevent the condensate drain from working properly, leading to water dripping down your drywall.
Once the bracket is secure, we carefully drill a 3-inch hole through the exterior wall. This single, small hole is the only penetration required to connect the indoor air handler to the outdoor unit. We slide a protective sleeve into the hole to shield the lines from sharp edges and prevent drafts or pests from entering your home.
Outside, we prepare the ground for the condenser. We install a level, weather-resistant pad or secure heavy-duty wall brackets if the unit needs to be elevated off the ground (a common practice in tight spaces or flood-prone areas). The outdoor unit is then bolted to the pad to ensure it remains stable, even during severe North Texas windstorms.
Step 2: Running Line Sets and Electrical Connections
With both units mounted, we run the line sets through the 3-inch wall penetration. The line set is the bundle that connects the indoor and outdoor units, consisting of:
- Two copper refrigerant lines (one liquid, one gas) insulated to prevent condensation
- A multi-conductor control wire that allows the indoor and outdoor units to communicate
- A flexible condensate drain line to carry away moisture removed from your indoor air
To protect these lines from the elements and keep your home looking neat, we wrap them in durable, paintable line-hide trunking. This trunking runs along the exterior of your home, blending seamlessly into your siding to satisfy even the strictest HOA guidelines in neighborhoods like Trophy Club or Southlake.
Next, we handle the high-voltage electrical work. We run a dedicated 208/240V line from your main electrical panel to an outdoor weather-resistant disconnect box mounted near the condenser. This disconnect box serves as a safety switch, allowing technicians to cut power to the unit during future maintenance.
Step 3: System Evacuation, Charging, and Testing
Once all physical connections are made, we move on to the most critical technical step: system evacuation. We connect a specialized vacuum pump and a digital micron gauge to the refrigerant lines.
This process does two things: it pulls a deep vacuum (typically down to 500 microns or lower) to remove all air and non-condensable gases, and it boils off any trace moisture inside the copper tubing. If moisture is left inside the lines, it can mix with the system’s oil to create highly corrosive acids that destroy the compressor over time.
We hold the vacuum to perform a decay test, ensuring there are absolutely no microscopic leaks in our flare connections. Once we verify the system is completely sealed, we release the refrigerant charge pre-stored in the outdoor unit. If your line set run is exceptionally long, we calculate and add the precise amount of additional refrigerant required for optimal performance.
Managing Disruption, Noise, and Local Permits
We understand that having home service professionals working in your house can feel disruptive. However, compared to a traditional central AC Replacement that requires extensive ductwork modifications, mini split installations are remarkably quiet and non-invasive.
The loudest part of the day lasts only about 15 to 20 minutes when we use a core drill to make the 3-inch wall penetration. If your home has brick, stone, or stucco siding, this process will create some noise and a small amount of dust, but our technicians use dust-containment shrouds and drop cloths to keep your home clean. The rest of the installation involves hand tools, mounting brackets, and electrical work, which produces minimal noise.
Grapevine and DFW Permitting Requirements
In the Dallas-Fort Worth metroplex, safety and code compliance are non-negotiable. Municipalities like Dallas, Fort Worth, and Grapevine require official building permits for mini split installations. These typically include an HVAC mechanical permit (governing the refrigerant lines and system capacity) and an electrical permit (covering the new dedicated circuit).
Texas state law requires that anyone handling refrigerant hold an EPA Section 608 certification. Furthermore, professional installations must be performed by licensed contractors holding a Texas Air Conditioning and Refrigeration Contractor License (TACL) and a Texas Electrical Contractor License (TECL).
When you work with us, we handle the entire permitting process from start to finish. We ensure that your system complies with all local municipal codes and schedule any required municipal inspections after the job is complete. This protects your home’s resale value, satisfies your homeowner’s insurance requirements, and keeps your manufacturer warranty fully intact.
Post-Installation Walkthrough and System Handover
Once the system is fully charged and powered on, we don’t just pack up our tools and leave. We conduct a thorough commissioning process to make sure everything operates exactly as designed.
We let the system run for at least 20 to 30 minutes while we monitor operating pressures, verify proper electrical draw, and measure the temperature split (the difference in temperature between the air entering the unit and the cold air blowing out). We also inspect the condensate drain line outside to ensure water is flowing freely away from your foundation.
Final Walkthrough: What to Expect on Mini Split Installation Day in Grapevine and the DFW Area
With the technical checks complete, we invite you to join us for a final walkthrough. We will show you exactly how to operate your new system using the remote control or wall-mounted controller. If you have opted to integrate your system with modern Smart Thermostats or smartphone apps, we will help you set up the connection and walk you through the programming.
During this handover, we will also teach you how to care for your investment. Mini split air handlers rely on simple, reusable mesh filters that slide out of the top of the unit. We will show you how to safely remove, rinse, and replace these filters—a simple task you should perform every two to four weeks to maintain strong airflow and clean indoor air.
Finally, we will provide you with all your installation paperwork, equipment manuals, and details on how to register your product warranty to ensure you receive the maximum coverage from the manufacturer.
Frequently Asked Questions About Mini Split Systems
How long does a typical mini split installation take?
For a standard single-zone system, the installation typically takes 4 to 6 hours and can easily be completed in a single morning or afternoon. If we are installing a multi-zone system with three to five indoor air handlers, the project will usually take 1 to 2 days.
Because there is no need for extensive Air Duct Installation, the process is much faster and cleaner than installing a traditional ducted system.
Do mini splits work well during extreme DFW weather?
Yes, exceptionally well! Modern ductless mini splits are designed to operate as highly efficient heat pumps. They can provide powerful cooling in extreme summer temperatures up to 115°F, and they continue to deliver reliable, energy-efficient heating even when Texas winter temperatures drop down to 5°F or lower.
Because they utilize advanced inverter technology, they run continuously at variable speeds, maintaining a perfectly steady temperature while using up to 40% less electricity than a traditional central system.
Can I install a mini split system myself?
We strongly advise against DIY mini split installations. Handling refrigerant requires specialized tools (like vacuum pumps, micron gauges, and manifold sets) and EPA Section 608 certification.
Furthermore, improper electrical wiring can pose a severe fire hazard, and failing to pull a proper vacuum can ruin the compressor within its first year of operation. Perhaps most importantly, almost all major manufacturers will immediately void your equipment warranty if the system is not installed by a licensed HVAC professional.
Conclusion
At Washburn Air, we are proud to be your go-to local HVAC experts in Grapevine, Southlake, Westlake, Highland Park, and throughout the DFW area. We understand how crucial reliable climate control is to your family’s comfort, health, and peace of mind.
From your initial load calculation to the final walkthrough on installation day, our licensed, friendly technicians are committed to providing a flawless, stress-free experience. We offer flexible Financing options to fit your budget, ensuring you don’t have to compromise on your home’s comfort.
Are you ready to experience the whisper-quiet, energy-efficient comfort of zoned heating and cooling? Schedule your Mini Split AC Installation with Washburn Air today!
{“@context”: “https://schema.org”, “@graph”: [{“@type”: “Article”, “headline”: “Mini Split Installation Day in Grapevine | Washburn Air”, “description”: “Know what to expect on mini split installation day in Grapevine and the DFW area, from setup to testing. Schedule with Washburn Air.”, “author”: {“@type”: “Person”, “name”: “Washburn Air”}, “publisher”: {“@type”: “Organization”, “name”: “Washburn Air”, “logo”: {“@type”: “ImageObject”, “url”: “https://washburnair.com/wp-content/uploads/2024/09/washburn-air-logo-800-400×261.png”}}, “datePublished”: “2026-06-30T02:31:31+00:00”, “dateModified”: “2026-06-30T02:31:44.221922”, “mainEntityOfPage”: {“@type”: “WebPage”, “@id”: “https://washburnair.com/blog/what-to-expect-on-mini-split-installation-day-in-grapevine-dfw/”}, “image”: “https://images.unsplash.com/photo-1759772238012-9d5ad59ae637?crop=entropy&cs=tinysrgb&fit=max&fm=jpg&ixid=M3w2MTMxNjF8MHwxfHNlYXJjaHwxfHxtaW5pJTIwc3BsaXQlMjBpbmRvb3IlMjB1bml0JTIwbW91bnRlZCUyMG9ufGVufDB8MHx8fDE3ODIxODIwODN8MA&ixlib=rb-4.1.0&q=80&w=1080”}, {“@type”: “FAQPage”, “mainEntity”: [{“@type”: “Question”, “name”: “What happens on mini split installation day in Grapevine and the DFW area?”, “acceptedAnswer”: {“@type”: “Answer”, “text”: “Technicians arrive in the morning, confirm the installation plan, mount the indoor air handler and outdoor condenser, run refrigerant lines, electrical wiring, and a condensate drain through a small wall opening, then complete electrical connections, evacuation, charging, testing, and a system walkthrough.”}}, {“@type”: “Question”, “name”: “How long does a mini split installation take?”, “acceptedAnswer”: {“@type”: “Answer”, “text”: “Most single-zone mini split installations are completed in 4 to 6 hours. Multi-zone systems serving several rooms typically take 1 to 2 days depending on complexity.”}}, {“@type”: “Question”, “name”: “What kind of wall opening is needed for a mini split installation?”, “acceptedAnswer”: {“@type”: “Answer”, “text”: “A small wall opening, typically about 3 inches, is used to run the refrigerant lines, electrical wiring, and condensate drain between the indoor and outdoor units.”}}, {“@type”: “Question”, “name”: “What electrical work is required for a mini split?”, “acceptedAnswer”: {“@type”: “Answer”, “text”: “The installation includes a dedicated 240V circuit and a disconnect box installed at the outdoor condenser.”}}, {“@type”: “Question”, “name”: “How do technicians choose the right mini split size for a home in DFW?”, “acceptedAnswer”: {“@type”: “Answer”, “text”: “Technicians perform room-by-room load calculations that consider square footage, ceiling height, insulation quality, and sun-facing windows. This helps prevent under-sizing, which can cause the system to run constantly and fail to cool the space effectively.”}}]}]}